
Lemon Madeira Cake
This delicious, buttery cake with its soft, zesty crumb is simply so good! This classic English cake (originally served with Madeira wine from the Portuguese Madeira Islands) is in my opinion just as enjoyable with a cup of tea.

For a tall, impressive looking cake, bake the batter in two 15cm diameter round tins (cutting each sponge in two for a four layered cake). For a two layered cake, divide the cake batter between two 20cm diameter round tins and remember to adjust the baking time. Halve the recipe for a medium size loaf tin (a humble dusting of icing sugar works a treat too). If you are very organized, you can bake the cake and make the lemon curd a day before assembling.

Enough for a tall, layered round cake (approximately 12 - 16 generous servings)
MADEIRA CAKE BATTER
unsalted butter, 300g
caster sugar, 300g (375ml or 1 + 1/2 cup)
zest of 4 lemons
eggs, 6
plain/cake flour/all-purpose flour, 300g (500ml or 2 cups)
baking powder, 7.5ml (1 + ½ teaspoon)
ground almonds/almond flour, 150g (375ml or 1 + 1/2 cup)
LEMON CURD
eggs, 3
lemon juice, 125ml (1/2 cup) - the juice of about 4 medium size lemons
caster sugar, 150g (180ml or 3/4 cup)
unsalted butter, 100g
SWISS MERINGUE BUTTERCREAM
egg whites, 3
caster sugar, 150g (180ml or 3/4 cup)
icing sugar, 165g (250ml or 1 cup)
unsalted butter, 200g - at room temperature or softened
fine salt, 1.25ml (1/4 teaspoon)
WHITE CHOCOLATE GANACHE (for the drip decoration - optional)
white chocolate, 120g
cream, 60ml (1/4 cup)

To start, line the bottom and sides of two round cake tins with baking paper (I use two 15cm diameter round tins for a four layered cake or two 20cm round tins for a two layered cake).
Preheat the oven to 180°C (160°C fan).
For the cake, roughly chop the butter then place it in a heat proof bowl. Softened the butter for a few seconds in the microwave then transfer it to a large mixing bowl or the mixing bowl of a free-standing mixer.
Add the caster sugar and lemon zest (best done using a fine microplane over the mixing bowl).
Beat together for about 5 minutes until the mixture is pale and fluffy (use the paddle attachment if using a free-standing mixer).
Add the eggs one at a time, beating well for about a minute after each addition (scraping down the sides regularly with a spatula).
In a medium bowl, sieve together the dry ingredients then add them to the butter and egg mixture.
Beat together until just combined and uniform.
Divide the batter among the tins, smoothing out the tops.
Bake until golden and a skewer inserted in the middle of each cake comes out clean (approximately 1 hour but will depend on your tin sizes and oven).
Once baked, remove the tins from the oven and leave the sponges in the tins to cool completely (cover with a clean tea towel to prevent moisture from evaporating).
To make the lemon curd, combine the eggs, sugar and lemon juice in a heat proof mixing bowl then place it over a medium saucepan of simmering water (making sure the surface of the water does not touch the bowl).
Whisk by hand for a few minutes until the mixture thickens. Add the butter and whisk until smooth.
Place a sieve over a heat proof bowl or storage jar and pour the thick, cooked lemon curd through the sieve to ensure it is smooth.
Cover and refrigerate until cool.
To make the Swiss meringue buttercream, start by placing the egg whites and caster sugar in a large heat proof mixing bowl (I use a stainless-steel free-standing mixer bowl). Set it over a medium saucepan of simmering water (making sure the surface of the water does not touch the bowl).
Whisk by hand for a few minutes until the sugar has dissolved (you can test this by rubbing a bit of the mixture between your fingers - when ready, is should feel smooth) and the mixture feels warm to touch (about 65°C - 70°C on a thermometer if you are unsure).
Note: You are not trying to whip the meringue at this stage but instead you just want to dissolve the sugar and cook the egg whites gently.
Remove from the heat and whisk on a high speed with electric beaters or an electric mixer until the meringue is stiff and glossy.
Add the icing sugar and beat until uniform (slow at first to prevent being engulfed by a cloud of icing sugar).
If the meringue still feels very warm, slow the mixer to a medium speed and whisk for a few minutes until the mixing bowl is cooler to touch (i.e. the meringue reaches room temperature).
Add the soft, room temperature butter and whisk on a high speed until smooth and glossy (at least 2 - 3 minutes).
Once the buttercream is smooth, add the salt and mix until uniform.
(If after several minutes of mixing the mixture seems split, the butter might be too cold - warm the mixing bowl gently using a bain-marie then whisk again on a high speed. If the buttercream looks very runny, the butter or the meringue might be too warm - cool the mixing bowl for a few minutes in the fridge, then whisk again on high).
To assemble the cake (easiest done with a cake turntable, but not essential):
For a four layered, 15cm round cake, divide each sponge in two using a sharp serrated knife - turning the cake as you cut in order to see the sides and ensure it is cut evenly (for a two layered, 20cm/22cm round cake, you can simply keep the sponges as is - they should not have domed too much in the oven, but you can even the top with a knife if needed).
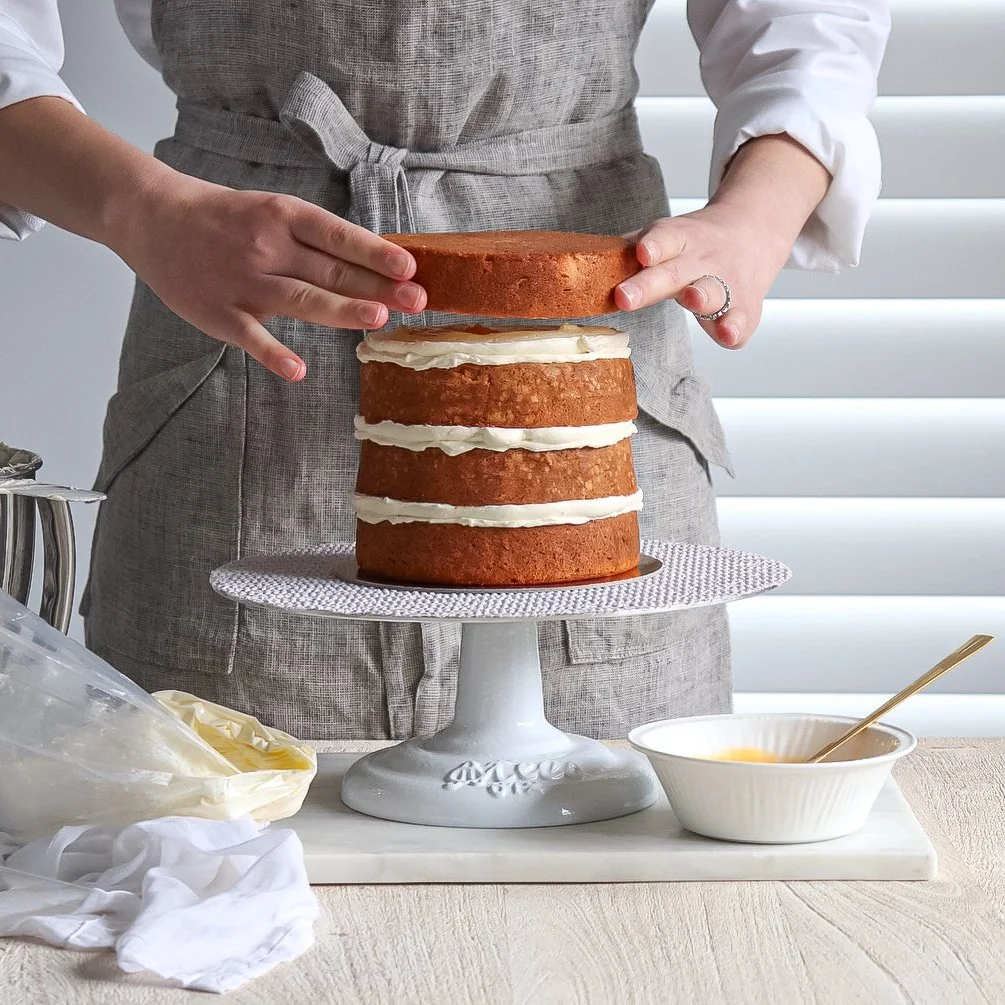
Place the first cake layer on a cake board or serving plate.
Spread a tin layer of buttercream over the top, then pipe a buttercream border (if you do not have a piping bag, a clean plastic food storage bag with one of the corners snipped off will do just fine).
Spoon a good dollop of cooled lemon curd in the center and spread it out, then place the second cake layer on top (if making a two layered cake, turn the cake upside down so that the bottom is facing upward to ensure a flat top).
Repeat the layering until all the cake layers have been added (finishing with the last cake layer having the bottom facing upwards).
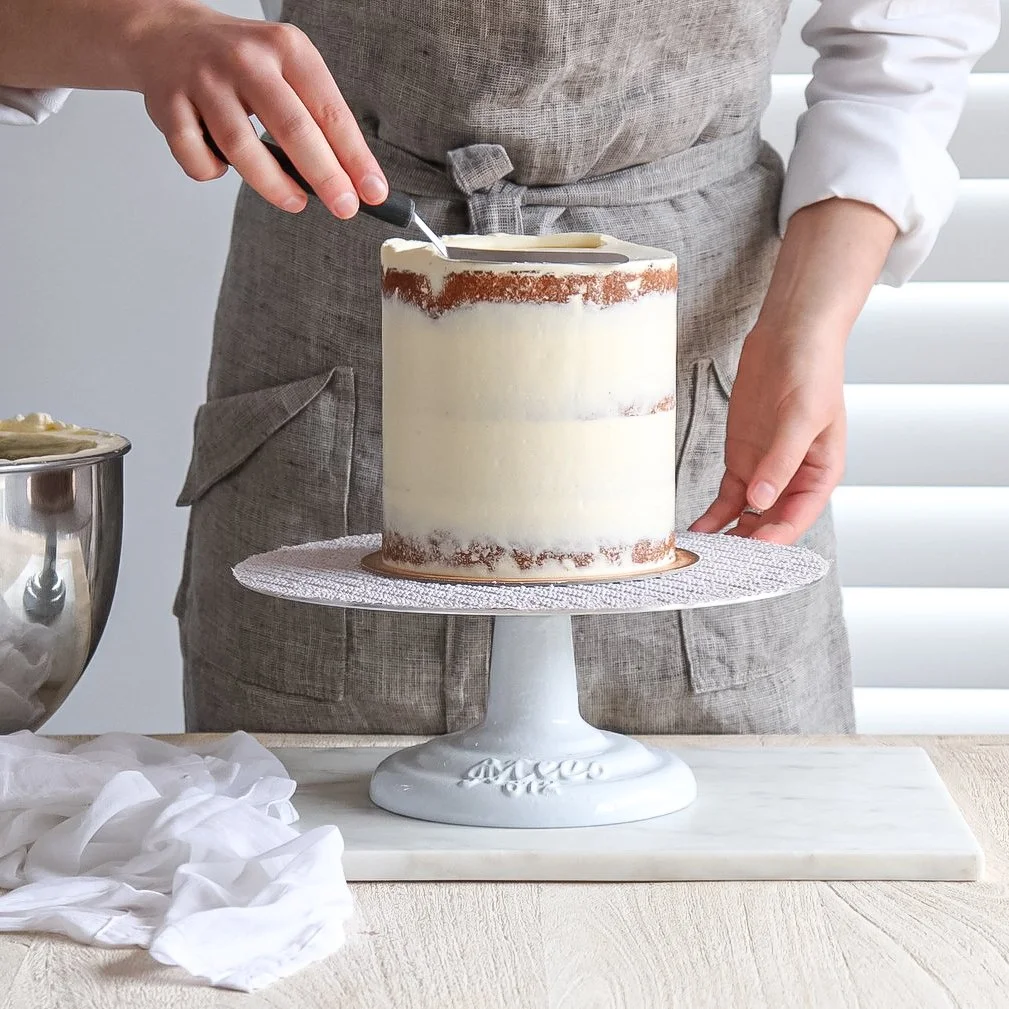
Using a spatula or knife, cover the top and sides with a thin layer of buttercream (this is the crumb coat to trap all the loose cake crumbs, so do not stress if there are a few crumbs visible in the icing).
Refrigerate the cake for about 10 minutes until the buttercream is firm.
You can add a drop of yellow food colouring to the remaining buttercream if you wish for the second covering of buttercream to be coloured.
Coat the top and sides of the cake for a second time (thin if you prefer the semi-naked finish or thicker if you want the cake completely covered).
For a sharp finish, use a dough/cake scraper to smooth the sides (this is where a cake turntable is handy).
Flatten the top ridge by scraping with a spatula or scraper in an inward motion.


Refrigerate the cake for approximately 20 minutes until the buttercream is firm and cool (if you are adding the drip decoration, this step is essential).
For the chocolate drip effect, make the white chocolate ganache while the iced cake is cooling.
Place the white chocolate (broken into pieces) in a heat proof bowl and add the cold cream.
Microwave together for about 10 seconds at a time whisking a little in-between bursts until smooth (you can add a drop of white food colour if you wish).
Remove the cooled cake from the fridge. Using a teaspoon, start adding small amounts of ganache to the top edge of the cake (the amount of ganache you add will determine how far the ganache drips down). Since the iced cake is cool, the ganache should set fairly quickly (if too runny for your liking, allow the ganache to cool a bit before you continue).
Continue until the sides are complete then fill in the remaining top by spreading a bit of ganache with the back of the teaspoon until the top is covered.
Allow the ganache to set for a few minutes before decorating. I used fresh flowers, macarons and seasonal berries.

